

2 August 2020
What is a LUT?
A LUT is an abbreviation for “Look Up Table”, which is basically a transformation from one colour space to another. These files are used by video editing software to change how the footage appears on-screen.There are creative and technical types of LUTs, which can be broken into four categories: Input LUTs; Output LUTs; Display LUTs and Creative LUTs.

Examples of images being transformed from one colour space to another
How LUTs transform a picture is extremely complicated, but as a director or producer you do not need to know the mathematics and colour science behind it. All you need to know is how they are used in the filmmaking process.
A 3D LUT is actually a mathematical cube, which takes colour and brightness values and converts them into other colour and brightness values. So let’s think of a LUT as a magic box, because that’s way more fun. You can put something into it, blink your eyes, and you can get something different out of it. There are thousands of different types of magic boxes! There are some which are created by camera manufacturers like Arri and Sony and can be downloaded off their website, others created by clever people on the internet, individually or in packets – or you can have a colourist make one for you.
Input LUTs
An input LUT is a magic box that you use at the start of the production process. You feed the camera footage into it and what you get out is a colour space that you want to work in. For example you could feed raw Sony footage (called Sony Slog) into it, blink, and then get out a Rec709 colour space (which is the standard colour space we use for broadcast). This is helpful because if you have used a few different cameras which all look different, we can quickly and easily put them in their corresponding magic box and end up with all of them in the same working space of Rec709 for example.
Creative LUTs
A creative LUT is a magic box which can yield some wild results. You can buy ones which will give you a retro vibe, an orange and teal look or a bleach bypass look. More on creative LUTs shortly.
Output LUTs
These come at the end of the grading process, whereby you feed your finished grade into this magic box, and make it magically match the display you want to watch it on. For example, you may want to output your Rec 709 grade, through an output LUT magic box, to a P3 cinema colour space. This is called a Rec 709 to P3 LUT. This new LUT would be “baked in” – meaning the look is baked or cemented into the image, and you can not reverse it. An input LUT, a creative LUT and an output LUT all get baked into the image on export.
Viewing/ display LUTs
This is the only one that won’t get baked into your image, it’s more like a teaser magic box. Not the real deal, it just shows you what it might look like if you had the real thing. An example of a display LUT would be a Film Emulation LUT, where the colourist feeds their grade into it, and out pops an example of what it would look like if it was printed on film stock. You take it off before exporting. But you might keep it on throughout the whole grade just to see what it looks like.
Another example of where a display LUT might be used is on-set. The footage from the camera could be fed into the on-set monitor and a Rec709 Display LUT is being applied so the video village can see what the pictures will look like when they have some proper contrast and colour in them. This doesn’t change the actual recording, it is just used for monitoring.
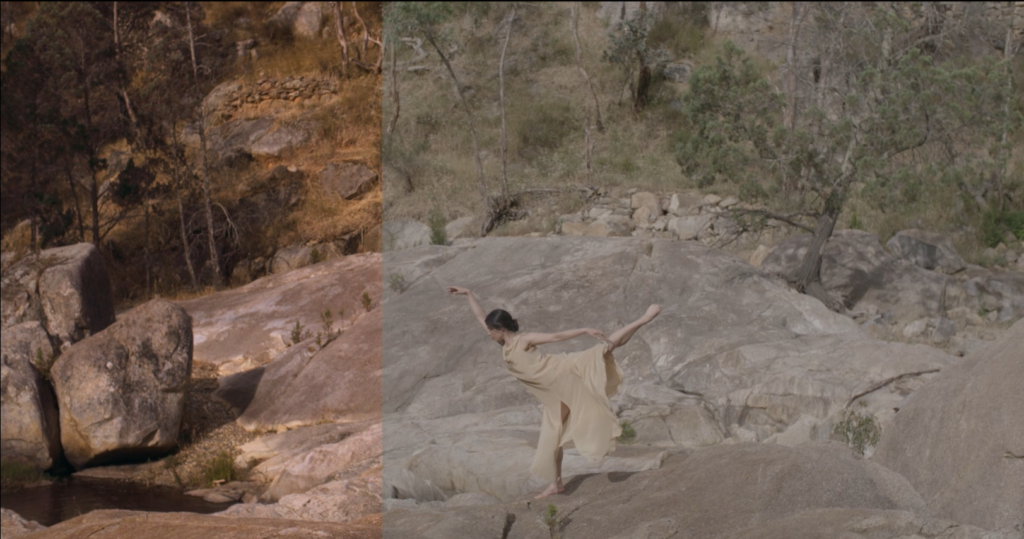
Before and after colour graded image from the Trampoline music video
More on Creative LUTs
These became extremely popular a few years ago, particularly with people who didn’t know how to colour grade, as it meant they could now feed their images into the magic box and come out with a very stylised look. It also assisted with colour correction to some degree.
Our Senior Colourist Angela Cerasi says she was slow to join in on the LUT bandwagon “I thought – I already know how to grade, why would I want to put someone else’s creative grade on this media?” You lose creative control when you just universally add a LUT over your footage – some shots might look fine but you might not be entirely happy with some element of the picture.
As per Angela’s example: “The director likes the general vibe of the grade but wants you to saturate the reds, and also bring back some details in the blonde hair. Here is when you can run into trouble, because the box has done weird things to those reds, and the highlights, and they now behave differently then you would expect.
Then as a colourist you have three options:
- Remove the LUT completely and start again, building the grade cleanly yourself.
- Start again but this time only use the magic box a little bit – you use the LUT but not at 100%, instead you try 50%, and see if you can get the reds and highlights back.
- “Grading under the LUT”. So this means, doing what you want with the reds and highlights, before it goes in the magic box. Therefore preserving the parts of the picture you want and need, before it goes and has a wild time in the magic box.”
Angela occasionally uses LUTs because it can be an efficient way to get to a good starting point for a grade and if a filmic look is called for in the brief “I find that creative LUT’s that I haven’t created myself always give off a filmic look, and I think this is why they are so popular because all of a sudden people could bash on a LUT and have their images look more cinematic”.
If the brief is not for a filmic/ cinematic brief (for example – a medical documentary) Angela will generally not use a creative LUT she hasn’t created herself.
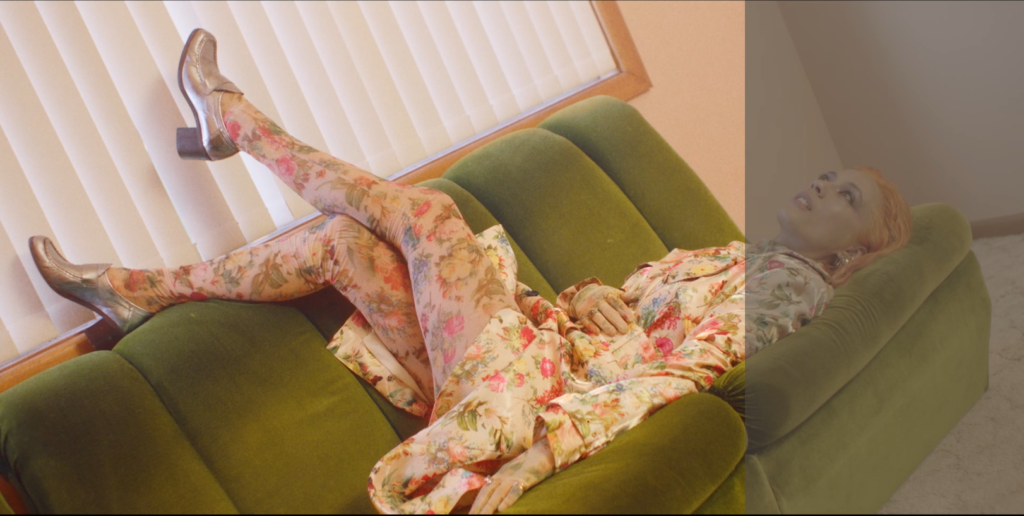
Before and after colour graded image from the Dermalogica “Hold The Pose” TVC
As a director or producer, if there’s only one thing you take away from this blog, it is this: You should have a LUT on your raw or log footage during the edit. You should be viewing the pictures as the DP intended them to be viewed, and not as milky, washed out images. So make sure the DIT or edit assist is going to transcode the media for the edit and bake a LUT into the footage. This will be an Input LUT (so one which changes the camera footage into a proper working space), or else a creative LUT that perhaps the cinematographer has supplied, care of the colourist. You could be watching these rushes for an awfully long time, so do not let the edit assistant or DIT be the one who decides whether or not a LUT is applied, or what type of LUT.
There is a well-known adage that directors can fall in love with the images they are seeing in the offline edit. So in the colour grading suite months later they might want everything to look like the offline – which could be milky and washed out. It can be a shock to then see the images with contrast and colour, and it can be a time-consuming job to reset everyone’s vision back to normal.
You can listen to this on Angela Cerasi’s podcast “The Art of Colour Grading” here.